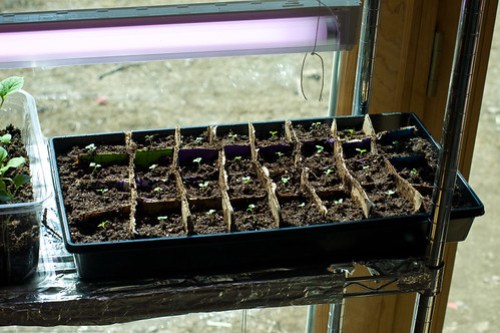
Humble Garden

ReSkilling for future food independence

Archive for the ‘growing’ Category

Seedball Dispenser – an AMAZING idea!

Posted by Nika On July - 8 - 2010

seedballs

This is an idea that really sings to me! An unattended gumball dispenser dispensing seedballs!

Support their project at KickStarter at this link: Greenaid-Seedbomb Vending for Greener Cities!

See how it works: (click through for video)

See their site at: GreenAid

This crowd sources guerilla gardening.

I really hope it takes off!

Here is their description:

What it is:
Made from a mixture of clay, compost, and seeds, “seedbombs” are becoming an increasingly popular means combating the many forgotten grey spaces we encounter everyday-from sidewalk cracks to vacant lots and parking medians. They can be thrown anonymously into these derelict urban sites to temporarily reclaim and transform them into places worth looking at and caring for. The Greenaid dispensary simply makes these guerilla gardening efforts more accessible to all by appropriating the existing distribution system of the quarter operated candy machine. Using just the loose coins in your pocket, you can make a small but meaningful contribution to the beautification of your city!

Why it matters:
It’s fun, profitable, educational, sustainable, and interactive. Greenaid is equally an interactive public awareness campaign, a lucrative fundraising tool, and a beacon for small scale grass roots action that engages directly yet casually with local residents to both reveal and remedy issues of spatial inequity in their community.

How it works:
Whether you’re a business owner, educator, or just a concerned citizen we’d like to work with you to get Greenaid in your community. You can purchase or rent a machine (or two, or ten…) directly from us and we will develop a seed mix as well as a strategic neighborhood intervention plan in response to the unique ecologies of your area. You then simply place the machine at your local bar, business, school, park, or anywhere that you think it can have the most impact. We will then supply you with all the seedbombs you need to support the continued success of the initiative.

The Early June Garden

Posted by Nika On June - 3 - 2010

kid-cutie-450

(One of our cutie goat babies)

The video above shows how much the garden has grown in the past two weeks!

Early garden baseline

Posted by Nika On May - 22 - 2010

scotch-garden-450

I thought I would share a quick video that gives you a base line sense for my garden before the growth really starts to take off. Should be interesting when compared to later videos.

Once certain plants are up further, I will be mulching to retain moisture.

Llama shearing, oh my!

Posted by Nika On May - 17 - 2010

llama-shear-450

What a hair raising adventure in animal husbandry this week!

We had contracted with a sheep/alpaca/llama shearer to come down from upper Vermont to shear our llama.

Its not humane to keep a halter on a llama for long so she generally is free of any fetters, running wild with the goats in their acre enclosure.

To be sheared, she needed to have a halter on. She is VERY skittish and only tolerates us barely touching her when she has her head in the feed bucket. She pulls away quickly even then.

We tried for this last week to slip the halter on her but never were able to. Thursday was D-day and the shearing guys came and she still had no halter (YIKES!).

I felt like such a bad llama keeper.

Our llama easily weighs 300 pounds and is some 6-7 feet tall, keep this in mind.

The shearing guys come into the pen and we proceed to try to pen her into a corner.

Misty the llama was NOT amused.

She got angry and when she is angry she gallops up and down the wooded stump strewn hills of the enclosure REALLY fast.

When she gallops, she will run RIGHT at you to do a headfake at the last second and run askew and away from you.

When she does that, I hide behind trees.

When she gallops, pre shear, her fur flounces up and down like this gigantic majestic fluffy ball of fur with strong animal muscles, fierce kicking legs, hooves, and a predilection of spitting like a camel (she is a camelid).

I gave up hope after half an hour and was resigned to paying these poor guys for their wasted trip.

Thing is, they pride themselves on NEVER having been beaten by an animal, I had no idea.

They admitted later that they were ALMOST about to give up when one of them tried one last lunge, freestyle, at the llama’s neck (as she was at FULL gallop, gulp!)

The guy GOT her! We quickly put the halter on her and they held her to a tree while we got the extension cords out there and they began to do their very dangerous job.

Llamas do NOT take kindly to the indignities of shearing. Its important to get the fur off every few years (many do it every year) because it can become a bit much in the summer) Not sure what wild llamas do but I am guessing that up in the mountains of Peru summer heat is never an issue.

The guys had to shear her AS she jumped around, really scary (if she so much as steps on your foot, its gonna hurt).

The guys were so persistent!!! I have put a series of photos below showing the process. Llamas also need to have their front teeth trimmed if they grow too long. By the time the shearing was done, she had calmed down a bit so I asked them to trim her teeth. Those photos are at the end!

This is what she looked like before shearing, the after shot is at the top of this post!

Humble Garden: misty the llama in the fall sun

Humble Garden: Llama shearing

Humble Garden: Llama shearing

Humble Garden: Llama shearing

Humble Garden: Llama shearing

Now the teeth trimming, notice the smoke or dental material filling the air.

Humble Garden: Llama teeth trimming

Humble Garden: Llama teeth trimming

All Done!

Fetlocks, newborns, new gardens

Posted by Nika On April - 16 - 2010

goat-bubbles-450

Kidding Drama

Things have been very busy around here due to it being a long drawn out kidding season. We had girls who got pregnant over several estrus cycles so the babies were kidded out over quite a long period.

We ended up with 10 kids I think. 6 of them are female which we will keep (and have all been disbudded now) and the 4 males will be sold.

This brings us to something like 22 goats total, lots! We have been letting the babies nurse but tomorrow we will separate them and start milking. At first the milk goes to the babies and then we will wean them and have the milk for ourselves.

All the babies kidded out well and healthy except for the very last one (figures huh?).

The last baby was a singleton of average size but her legs were really long. Because of this the baby had been very cramped in utero so her fetlocks had contracted. What this means is that, as you can see in the photo below, her little hooves were forced back under so she was walking on her little tiny newborn knees.

Humble Garden 2010: close up of splint

This doesnt need to be a permanent defect and can be fixed by using splints to force her legs into the correct position and allowing the tendons to stretch a bit and begin to mineralize from the milk she drinks.

The following photos show how we made homemade splints from cut up milk jugs, rags, and duct tape.

Humble Garden 2010: sealed with duct tape

Above you see the splint as we put it on the fetlock below her knee. We tested to see if it fixed the defect.

Humble Garden 2010: testing but not right

It didnt work out as I wanted because she was just bending badly at the knees. We put on a second course of splint, up above her knees so that her leg dynamics were more about using the hoof correctly.

Humble Garden 2010: more support

You can see below that it worked out better with the second course.

Humble Garden 2010: seems to work

Humble Garden 2010: Baby O meets Rosie the kid

Humble Garden 2010: Baby O meets Rosie the kid

After a few days we removed the splints to test her out. We found one hoof well positioned but not the other so we replaced that splint.

Humble Garden 2010: Update on Rosie, weak fetlocks

Above, you can see her lounging (she is a great lounger). She is very tenacious and stubborn and has a distinct personality. We named her Rosie.

Humble Garden 2010: Update on Rosie, weak fetlocks

Above, you can see Rosie nursing from her mom Spelt.

Since these photos we have been able to remove her last splint and now she runs and frolics and is growing like a weed!

Spring Cleaning

We have put in some new fencing and segregated the goats from their usual pens so that we can clear out all the muck. This will require disassembling the pens and using a tractor to rake out all the stuff!

Goats go psychotic and loco and get super angry if they get rained on so we have build temporary rain shelters during this time of cleaning. The one you see below is one of two, the second (not shown) is much bigger.

Humble Garden 2010: temporary shelter

New Garden Beds

Below you see a panorama photo of our early spring garden (older beds on the right) that shows the tree clearing (background) and new raised beds on the left.

Humble Garden 2010: new garden beds

The photo below shows a closer view of these new beds.

Humble Garden 2010: new garden beds

They are amended with a LOT of llama manure and will be planted with a mix of perennial and tender annuals.

Planting has to wait until at least after this weekend because we are looking at night freezing and snow (sighs).

Edible Forest Gardening Workshop

Posted by Nika On November - 4 - 2009

Edible Forest Gardens: sampling paw paws

(Eric and Jonathan teaching on first day of workshop)

Recently I had the great fortune of attending Eric Toensmeier‘s Edible Forest Gardening workshop in Holyoke, MA Oct 16 to Oct 18. Before I go any further let me just say that if you have a chance, please go to this workshop the next time they hold it. You will be very glad you did! I am not sure when the next one might be. I will certainly blog about it here when I find out. There are other workshops that look VERY interesting at Eric’s “Event” page.

Edible Forest Gardens: talking abotu paw paws

(Eric standing under a paw paw tree, freezing with the rest of us!)

As you may recall, Eric, along with Dave Jacke, wrote “Edible Forest Gardens (Vol.s 1 and 2)” and he also wrote “Perennial Vegetables“, a resource for those of you interested in learning about new perennial edibles suitable for your region.

There were three other people who made this event possible.

Edible Forest Gardens: micro cucumber fruits

(Jonathan sharing these really cute little cucumber like fruitlets)

Jonathan Bates, of Food Forest Farm, who was a fantastic co-presenter and amazing resource for so many of the MILLIONS of questions that I had. Check out his site and learn more about what his farm can do for your budding perennial food garden.

Edible Forest Gardens: talking about trees

(Steve answering our many questions while on a walk through some of his land)

Steve Breyer, Tree God Extraordinaire and moss evangelist of the Tripple Brook Farm, very generously hosted the workshop on two of the days. His farm / nursery is an amazing play land of edible plants and northern food bearing trees.

And finally, Marikler Toensmeier (Eric’s lovely wife) who did a ton of work putting together all the delicious and wholesome foods at this event. I dont have any photos of Marikler because it seemed intrusive!

The conference began on the evening of Friday October 16th at Holyoke Community College. We gathered in the conference room you see in the photo at the top of this page and Eric and Jonathan did a lovely job of immersing us into the world of edible forest gardening with an overview of the various aspects of forest and forest-like gardens as well as some permacultural principles.

This got us ready for the next day when we were going to be meeting at Eric and Jonathan’s homes and shared urban perennial garden for a tour and further discussions about edible forest garden design. If you have the book Perennial Vegetables, you will recognize his garden in some of the photos in the book.

Before we ended the night, we snacked on ripe paw paws!

Edible Forest Gardens: sampling paw paws

(Paw paws)

The next morning, Saturday, bright and early and quite chilly, we met at Eric and Jonathan’s home to begin our tour. We started with the very sunny morning sun side of the house and learned about it’s microclimate and the sorts of plants that they are able to grow there. Mind you, back in my garden it had been snowing and the season was DEFINITELY over. It actually snowed at our home while it was nice in Holyoke.

We started the day off by tasting these cute super tiny wild cucumber like fruitlets. I can not remember the name of this plant, sorry!

Edible Forest Gardens: micro cucumber fruits

(Jonathan with wild cucumber like plants)

They also grow non-edible bananas here.

Edible Forest Gardens: non-bearing banana

(Banana tree)

Edible Forest Gardens: hardy kale

(A hardy kale)

Edible Forest Gardens: sub tropical plants

(Other hardy subtropicals)

We walked into the back and learned about how they went from a hardpack urban waste lot to a wonderful abundant perennial garden via a specific design process.

Edible Forest Gardens: design process

(Phil talking to Jonathan as he holds up plans that came out of their design process)

I want to take an aside and say just how glad I am to have gotten a chance to meet Phil and Tom, up from Brooklyn. They have been diligent campaigners for our world and transition. They have put together peak oil, permaculture, urban gardening, and many other sorts of events in the NYC area over the years. I look forward to getting to know them better in the future!

We then split up into groups and Eric and Jonathan took us through the garden, plant by plant, and explained pretty much everything about them from their polyculture setting, to their function in the larger design, to the types of fruits they bore (and we got many taste tests) as well as how they didnt fit in or might need to be or had been modified or moved to be a better part of the whole design.

Here are a few photos from the tour.

Edible Forest Gardens: under the paw paw tree

(Eric pointing out paw paw fruits)

Edible Forest Gardens: sea kale

(Marikler and I made sea kale quiches – REALLY delicious)

Edible Forest Gardens: sea kale

(More Sea Kale)

Edible Forest Gardens: asparagus berries

(Asparagus Berries)

Edible Forest Gardens: talking about plants

(Jonathan holding forth over the comfreys)

Edible Forest Gardens: light and shadow

(Comfrey in question)

Edible Forest Gardens: comfrey

(Comfrey close up)

Edible Forest Gardens: weed

(Sweet cicely and a weed that I have LOTS of [purple in photo] turns out it was used by native americans in region)

Edible Forest Gardens: comfrey and cicely

(Comfrey and sweet cicely)

Edible Forest Gardens: talking about plants

(Eric and others chatting by tool shed and chicken house)

Edible Forest Gardens: lunch!

(Lunch! I made homemade bread for the occasion)

After lunch we took off for the Tripple Brook Farm to begin a look at a large scale of edible forest gardening.

As I mentioned before, Steve Breyer owns this amazing place. There is so much one can say but I am going to simply share images from the tour we took.
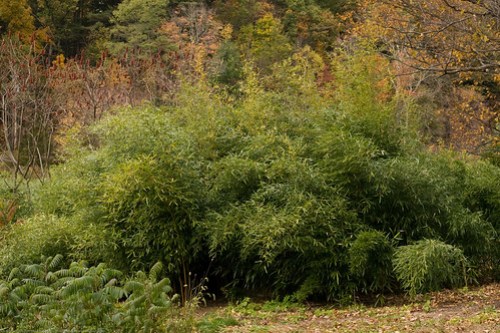
Edible Forest Gardens: bamboo

(Bamboo in the wild Massachusetts country side)

Edible Forest Gardens: unidentified

(A neat tree with fruits but I do not know the name. They look like yellow cherries)

Edible Forest Gardens: american persimmon

(American Persimmons)

Edible Forest Gardens: honeysuckle pods

(Honeysuckle pods, I think)

Edible Forest Gardens: talking about trees

(Steve discussing tree husbandry and planting strategies)

Edible Forest Gardens: lethal chestnut husk

(Chestnut husks are PAINFUL to the touch)

Steve feels very strongly that mosses should be the preferred ground cover (versus grasses).

Edible Forest Gardens: assorted ground covers

(Ground covers)

Edible Forest Gardens: micro thyme

(Super tiny thyme ground cover)

Edible Forest Gardens: black walnuts in husks

(Black walnut tree with nuts in husks on tree)

Edible Forest Gardens: black walnuts in husks

(Black walnut tree with nuts in husks on tree)

These photos totally do not give you a sense for how raw and cold it was that day. At this point in the tour we sheltered in Steve’s work shed (with warm wood stove) where we got to taste pine nuts, chestnuts and hardy kiwis and american persimmons and dogwood tree fruits (Cornus kousa).

Edible Forest Gardens: korean pine cones

(Korean pine cones)

Edible Forest Gardens: korean pine nuts

(Korean pine nut husks)

Edible Forest Gardens: hardy kiwis

(Hardy kiwis, the taste was AMAZING)

Edible Forest Gardens: cottonwood fruits, american persimmons

(dogwood tree fruits (Cornus kousa))

Edible Forest Gardens: cottonwood fruits

(dogwood tree fruits (Cornus kousa))

Edible Forest Gardens: black walnut

(Black walnuts in their husks)

Edible Forest Gardens: american persimmon

(American Persimmons – super delicious)

Edible Forest Gardens: american persimmon

(American Persimmons – super delicious)

Steve had the chestnuts roasting on the woodstove all morning. We have nut allergies so I didnt taste them but I fell in love with the way they looked! I shot a series of photos of these crazy spiky chestnuts.

Edible Forest Gardens: chestnuts in husks

(Chestnuts in husks)

Edible Forest Gardens: chestnuts in husks

(Chestnuts in husks)

Edible Forest Gardens: chestnuts in husks

(Chestnuts in husks)

Edible Forest Gardens: chestnuts in husks

(Chestnuts in husks)

Edible Forest Gardens: roasted chestnuts

(Roasted chestnuts)

Edible Forest Gardens: chestnut

(Opening roasted chestnuts)

Edible Forest Gardens: chestnut

(Opening roasted chestnuts)

Edible Forest Gardens: paw paw

(Paw paw)

Edible Forest Gardens: paw paw, hardy kiwis, cottonwood fruits

(Opened paw paw, hardy kiwis and dogwood tree fruits (Cornus kousa)

That evening we went back to Holyoke community college and delved deeper into polyculture design and learned quite a lot about grouping polycultural plantings that enhance and nurture each other and which build a more robust environment.

Some of what we learned that evening we used the next day in a practical way.

I went home just wiped out from that day. I was really worried that I would have no energy to get up and make the hour drive out early on Sunday, the third and last day. An odd thing happened though. I awoke really refreshed and ENJOYED driving at the crack of dawn out into the cold weather. I think there is something in these fruits that did me some good. Its also the fresh air and also, hugely more important, that I was doing something I found VERY exciting and engaging and with people who I really respected and admired.

This is quite a change from most of the jobs I have had in recent years – soul robbing activities. I can definitely see myself doing this for a living (I cant say how but it would be deeply satisfying).

The third day was intense. We assembled ourselves in Steve’s work shed and set to work on designing a new planting design for part of his nursery.

We did site assessment, analysis, and then in-depth design, as groups. It was an exercise in design as well as interpersonal communications.

While we didnt implement this particular design (there is only so much you can do in a few hours!) we pitched in and helped clean up the site and also put in some new plantings.

I have learned so much from this workshop. I would recommend it highly to anyone and I hope that some of you are able to attend future events like this. If you cant come out to tundra-like Massachusetts, you likely can find some near you!

Let me know if you do and how it goes!

Permaculture thoughts

Posted by Nika On September - 7 - 2009

Permaculture: 3rd iteration

Am in the process of FINALLY reading my two books on permaculture “Edible Forest Gardens Vol 1 & 2” by Dave Jacke and Eric Toensmeier.

As a result, I have been designing the next phase of the Humble Garden with an eye to increasing food growing space on land that doesnt have much top soil (its on ledge).

My initial design is seen above. Its something that will evolve over time!

I have started work on the first bed, next to the future frog pond. As money is tight, I need to be able to find ways to do this all for free with stuff we already have. Am recycling feed bags for the bottom of the new raised beds and am using the TONS of goat, chicken and llama manure and litter we have. I just need some wood chips and I think I will be set.

This is also very much the way permacultural principles would have you do this.

Inputs:

Permaculture: 1st bed arc - inputs

Llama and manure

Permaculture: 1st bed arc - inputs

Grass clippings (from neighbor)

Permaculture: 1st bed arc - inputs

Chicken and goat manure and litter (compost heap).

The following are a few photos of how the first raised bed was put down, sheet mulching or lasagna garden style.

Permaculture: 1st bed arc

Permaculture: 1st bed arc

Permaculture: 1st bed arc

More grass clippings and layer of llama manure pellets

Permaculture: 1st bed arc

I will be adding more organic material and possibly some lime or ash over time. Next spring this will all have composted down a bit and it should be ready for it’s first year of growing.

I hope to be able to get those other new beds built this summer/fall.

Early Blight on my Tomatoes

Posted by Nika On July - 6 - 2009

Humble Garden 2009: Tomato blight

I started my tomatoes indoors many MONTHS ago with tremendous loving care and great hopes. They are being taken down by Early Blight (Alternaria solani) and its possible I might lose all 60 plants. 30 had already set out beautiful blossoms, bees were buzzing, plants were growing like crazy and then, SPLASH, New England became a temperate rain forest with near constant cold monsoon like rain for more than a month.

Humble Garden 2009: Tomato blight

Those were perfect conditions for early blight. We have had sun the past few days and the soil s beginning to dry for the first time in MANY weeks. By the looks of my tomatoes, especially the few hybrid specials I had out there for the kids (mega-monster sized Zacs), they will not be able to shake the disease.

Needless to say, I am not a happy gardener right now. The entire garden has been set back at least a month, not good when you have so little time to garden in the first place.

Humble Garden 2009: Tomato blight

Cold New England gardening – an update

Posted by Nika On May - 30 - 2009

Humble Garden 2009: cabbage, mesclun, spinach

I wrote previously about our cold frames. I thought I would show you a few shots from around the garden showing those raised beds as well as the others.

Its been VERY cold here and very overcast so the garden has been in stasis. Today its sunnier and I expect our bush beans to explode this weekend!

Humble Garden 2009: spinach

Humble Garden 2009: cabbage and dill

Cabbage with companion dill

Humble Garden 2009: spinach and kale

Humble Garden 2009: mesclun, chamomile, kale, bok choy

Baby kale, bok choy, chamomile, and mesclun lettuces

Humble Garden 2009: green beds

Humble Garden 2009: organic open pollinated soybean

Sprouting organic open pollinated soybean plant

Humble Garden 2009: some of the beds

Tomatoes and peppers

Humble Garden 2009: Tomatoes

Some of our tomatoes

Brassicas, garlic chives, tomatoes, oh my!

Posted by Nika On May - 3 - 2009

Humble Garden 2009: early cabbage

(Early cabbage and spinach)

Today I am going to share an update of the few things that are growing out in the garden. Its been cold here until recently so only the brassicas and very well protected tomatoes have gone out!

Ages ago I started the early cabbage, kale and bok choi as seedlings inside the house.

Humble Garden: cabbage starts

(Cabbage seedlings)

Humble Garden: DIY flat dividers - cabbage starts

(Cabbages transplanted to larger potlets)

Then they were transplanted outside to endure freezing temps, snow, ice, freezing rain, really cold rain, smothering under plastic.

Humble Garden 2009: all plants transpanted

(Tiny seedlings in bed)

Humble Garden 2009: Completed cold frame

(Temporary cold frames)

When it warmed up a bit I replaced the cold frames with heavy floating row cover material.

Today, the early cabbage, kale, and bok choi are thriving under the heavy row cover material! Note, I interplanted with spinach as well.

Humble Garden 2009: kale

(Kale)

Humble Garden 2009: early cabbage, kale, spinach

(Cabbages and Kales)

I also planted out tomatoes under milk jug cloches.

Humble Garden 2009: Brandywine heirloom tomatoes in cloches

(Tomatoes under milk jugs)

Humble Garden 2009: Brandywine heirloom tomatoes in cloches

(Tomatoes under milk jugs)

Humble Garden 2009: Brandywine heirloom tomatoes in cloches

(Tomatoes under milk jugs)

Humble Garden 2009: Brandywine heirloom tomatoes in cloches

(Tomatoes under milk jugs)

Whole bed of 30 some tomatoes transplanted.

Humble Garden 2009: tomato transplant

(Tomatoes)

Even planted some tomatoes out with the now producing asparagus patch, they are meant to be great companions.

Humble Garden 2009: Asparagus and Tomatoes

(Asparagus and tomato transplants)

The mesclun lettuce and spinach under the heavy row covers are growing to town.

Humble Garden 2009: mesclun lettuce

(Mesclun lettuce)

Garlic chives that over wintered are growing to beat the band.

Humble Garden 2009: garlic chives

(Garlic chives)

Here s one of our 5 cats, Bass, looking for any spare pastured poultry that may be in the chicken tractor.

Humble Garden 2009: where did the pastured chickens go?

(Bass with a distinct lack of chicken)

Next post will be more on our diary goat herd!

About Me

We are a family of 5, including Nika, Ed, Q (14), KD (7), and Baby Oh (4). We garden 1024 square feet of raised beds plus assorted permacultural plantings. We also have 13 LaMancha dairy goats, 40 chickens, and one guard llama.

Twitter

    Photos

    The Singularity of Light0X3A1135-2.jpgS41226-162151(1)Christmas swap in Sudbury